Optimizing VAM with Voxta
Balance FPS, physics rate, MSAA, and pixel lights so VAM and Voxta share resources cleanly.
VAM is GPU-heavy. Voxta itself is light, but if you're running a local LLM on the same machine, the LLM is competing with VAM for the same GPU.
This guide is about getting both to coexist without one starving the other.
If you're using Voxta Cloud (or another remote LLM provider — RunPod, OpenAI, NovelAI), your local GPU only has to feed VAM. Most of this guide doesn't apply to you. Cap your FPS and move on.
The five settings that matter
FPS
Frames per second. Higher = smoother visuals, more GPU load.
Recommendation: cap at 90 FPS or less. Even on a 144 Hz monitor.
Two reasons:
- Stability — matching FPS to physics rate kills clothing clip and freeze issues.
- Resource management — every frame you don't render is GPU time the LLM can use.
Physics rate
How often the physics simulation updates. Match it to your FPS cap.
If FPS is capped at 90, set Physics Rate to 90 Hz.
Physics Update Cap
Maximum physics updates per rendered frame. Two practical values:
1— efficient at a stable 90 FPS. Slow-motion physics if FPS drops below physics rate.2— buffer against frame drops. At 45 FPS you still get 90 physics updates/sec (45 × 2). Slight overhead at stable frame rates.
If your scene routinely dips below your FPS cap, use 2. If it's rock-steady, use 1.
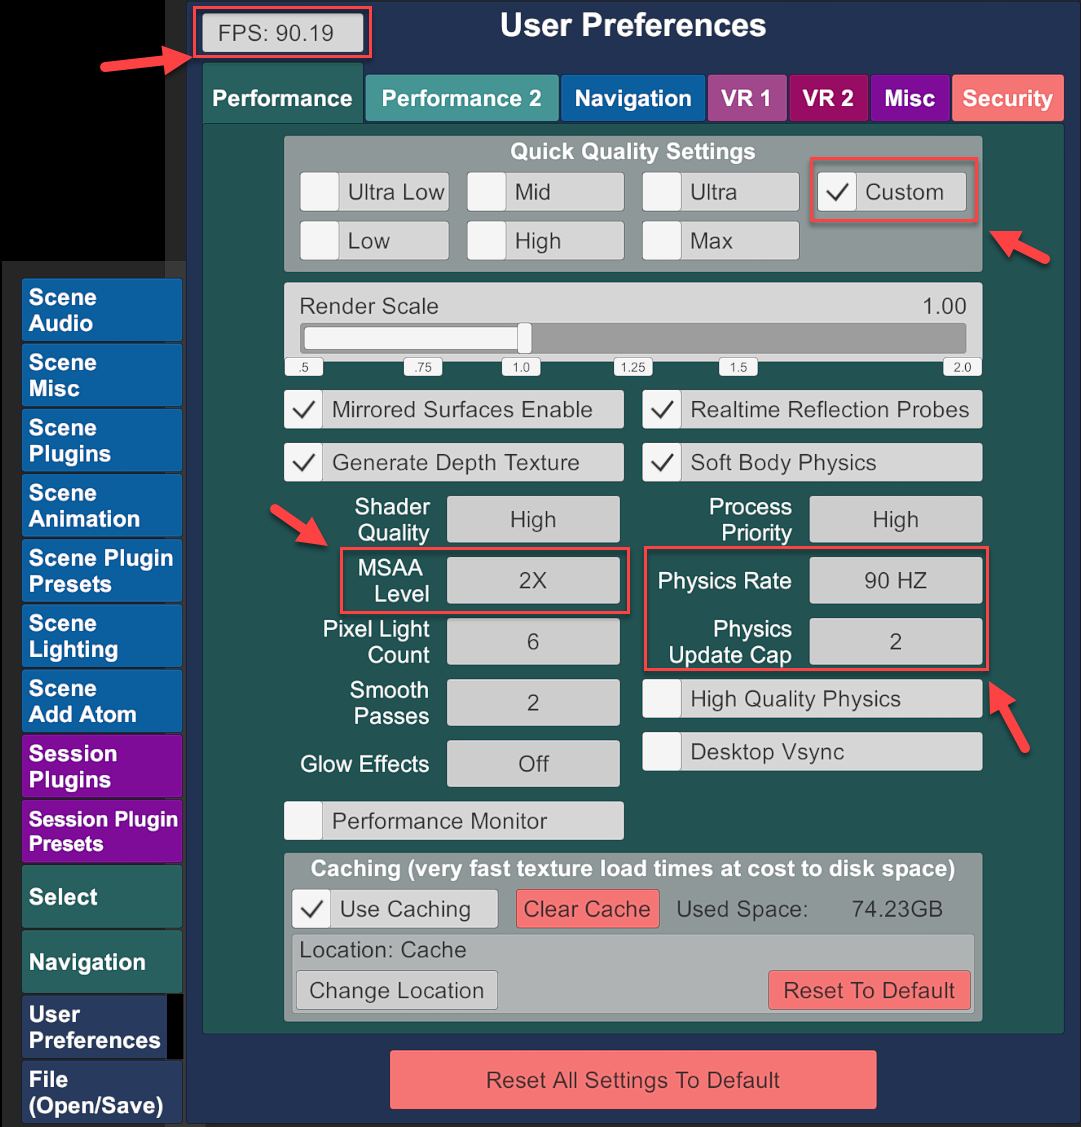
MSAA (Multi-Sample Anti-Aliasing)
Smooths jagged edges. x8 looks great and is expensive.
Recommendation when running a local LLM: set MSAA to its lowest level or off entirely. The visual hit is small. The LLM speedup is significant.
Pixel lights
More pixel lights = richer scene = more GPU load.
Recommendation: trim aggressively. Most scenes look fine with fewer pixel lights than you think.
Third-party overlays
NVIDIA's in-game overlay, ReShade, OBS overlays, MSI Afterburner displays — all of them quietly consume frames and VRAM. If you're tight on performance, disable everything you can do without.
Summary
For a local-LLM setup, the practical recipe:
| Setting | Value |
|---|---|
| FPS cap (driver-level, see FPS cap) | 60 / 72 / 90 |
| Physics Rate | Match FPS |
| Physics Update Cap | 2 if scenes drop frames, else 1 |
| MSAA | Lowest setting or off |
| Pixel Lights | As few as the scene tolerates |
| Third-party overlays | Off |
VR exception: if you're using VAM in VR, keep FPS at 90 — anything lower causes motion sickness for most users. The other settings still apply.