You can reduce the strain on your GPU and allow better performance from your locally-hosted large language models by capping the FPS.
Note: it’s advised not to exceed a 90 FPS cap for better system resource management, particularly when running Voxta with a local Large Language Model (LLM). You can certainly experiment with lower settings like an 80 FPS cap with 80 Hz Physics Rate and a Physics Update Cap of 2 or 1, or even 60 FPS cap with 60 Hz Physics Rate and a Physics Update Cap of 2 or 1. However, if you’re using Virt-a-Mate in VR, it’s generally better to stick with a 90 FPS cap to ensure a smoother experience, as lower frame rates can lead to a less comfortable VR experience.
NVIDIA Control Panel (NVIDIA GPUs)
- Right-click anywhere on your desktop and select “NVIDIA Control Panel” from the context menu that appears.
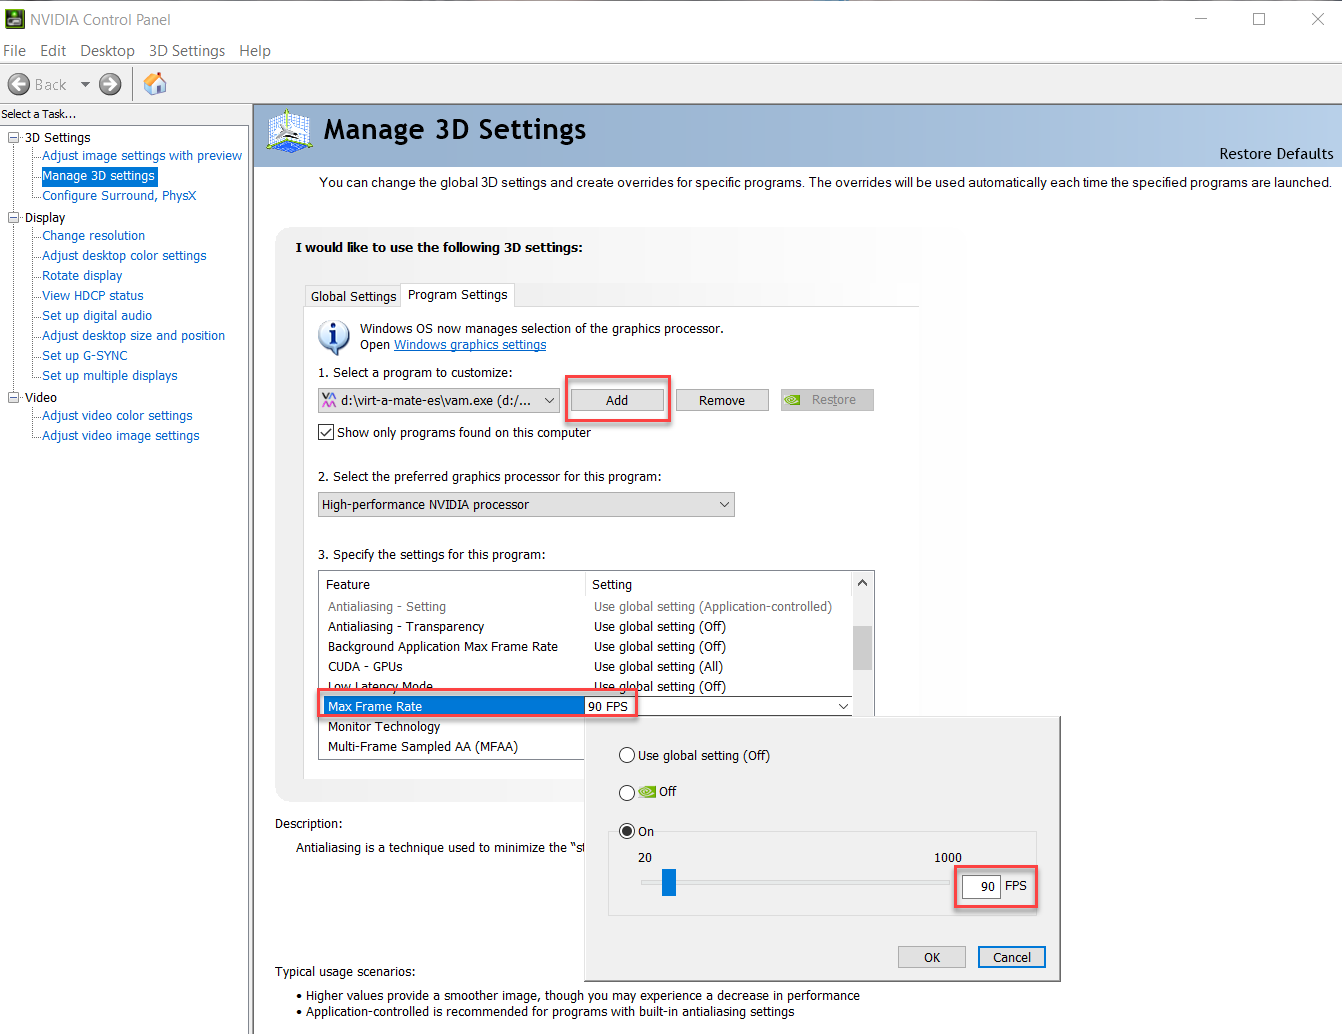
- Navigate to “Manage 3D settings” located under the “3D Settings” category on the left pane. From there, click on the “Program Settings” tab.
- If the program you want to set a custom FPS lock for is in the drop-down list, select it. If it’s not in the list, you can manually add the program by clicking on the “Add” button and then browsing to the program’s executable file (VaM.exe).
- Scroll down through the options until you find “Max Frame Rate.” This is the setting you’ll change to limit the FPS.
- Click on the “Max Frame Rate” setting and set it to the FPS value you desire. After setting your desired FPS, make sure to hit “Apply” at the bottom right corner to save your changes.

AMD Radeon Software (AMD GPUs)
- Open AMD Radeon Software and navigate to the “Gaming” tab located either at the top or bottom, depending on the version you are using.
- Click on the three dots in the upper-right corner to open a dropdown menu. Select “Add a Game” from the dropdown menu. Browse to the executable file (VaM.exe) of your custom program or game and add it to the list.
- After the game or application appears in the “Gaming” tab, click on it. This will open a new menu where you can adjust various settings.
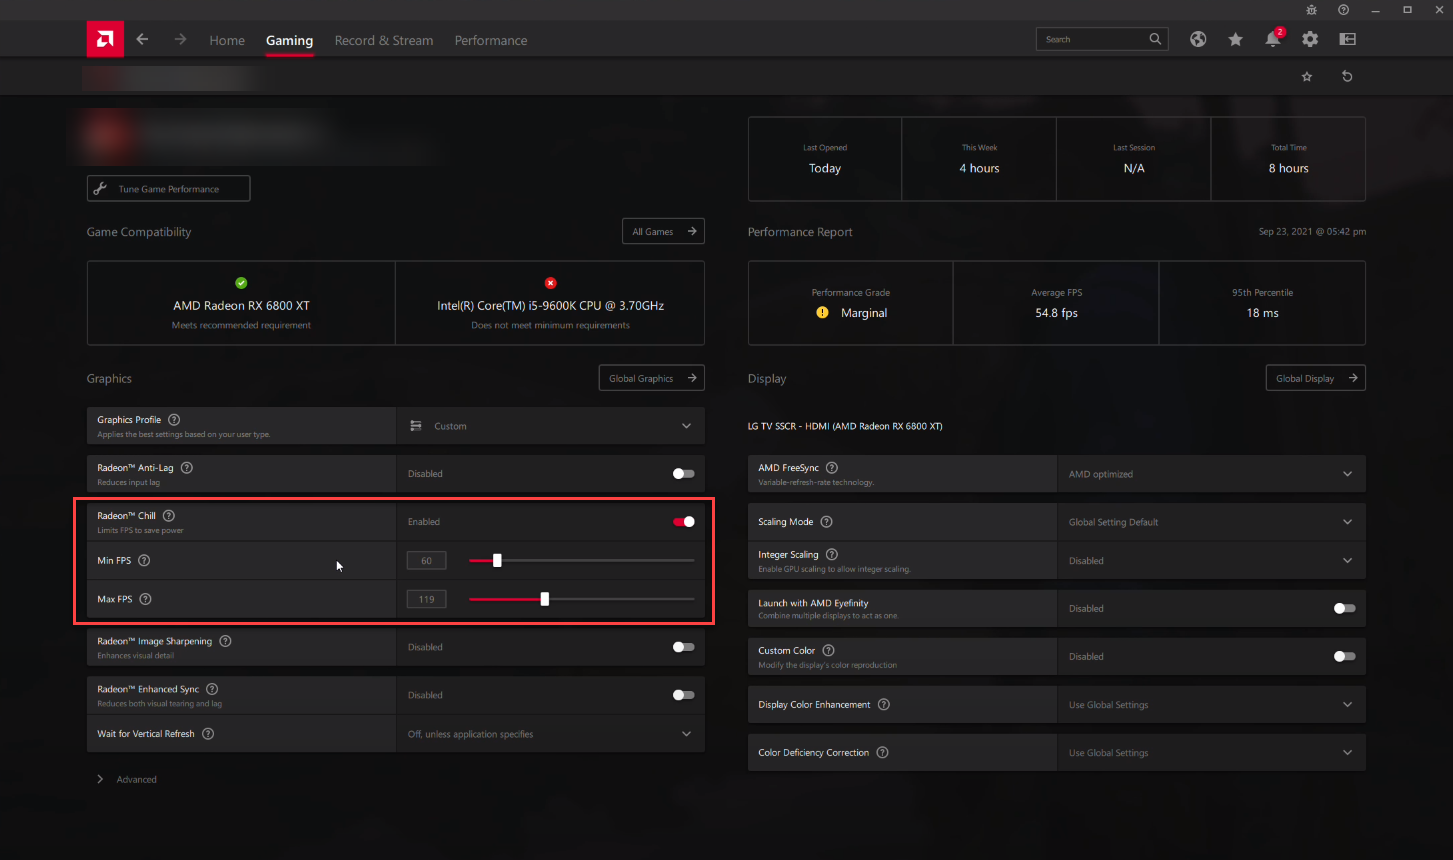
- Locate the “Radeon Chill” toggle and turn it on. After enabling “Radeon Chill,” sliders for minimum and maximum FPS will appear.
- Use the sliders to adjust the “Maximum FPS” and “Minimum FPS” to your desired levels. Changes will take effect automatically.
